Viewing and Editing Custom Metadata
I have Alfresco 3.2 Labs running on my Windows XP Laptop, built from source updated June 23, 2009, and I have deployed both Alfrsco.war and share.war to an instance of Tomcat 6.In previous versions of Share, it wasn't possible to view or edit custom metadata. Share 3.2 Labs addresses this deficit. Further, it leverages Surf's new forms architecture to render the metadata form dynamically. We will look at this in detail later. First, I will walk through the user interface for metadata.
In order to show Share's ability to view custom metadata, we need to create a new Site and Upload some content. Here are the steps briefly:
- Log into Share (as admin/admin) --> The User Dashboard renders with the 'My Sites' dashlet.
- Click on 'Create Site' in the My Sites dashlet (or select 'create site' from the 'Sites' drop down in the top menu) --> The Create Site popup will render.
- Enter the Name, URL name, and Description (optional) of this new site. (In my example I created a site with Name=Merchandising, URL name=Merchandising).
- Press 'Ok' when complete and the new site will be created, returning you to the user dashboard.
- Select the new site from the 'My Sites' dashlet, or the top menu's Sites dropdown --> the Site dashboard will render.
- Navigate to the 'Document Library' page to upload new content --> the Document Library page renders.
- Click on 'Upload' button to upload some content to the default documents folder.
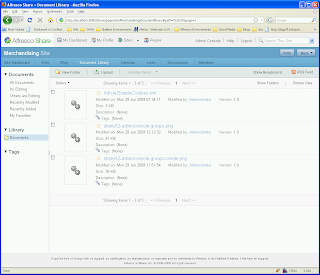
Here I am looking at Document Library in the merchandising site, where have uploaded an XML file and a couple of image files...

Hovering over one of the files in the list renders the actions that can be performed on that file.
Actions include:
- Download
- Edit Metadata
- Upload new Version
- More > (we will look at some of these later)
This list of actions is very configurable. We may show how to do this in a later blog.
The 'Edit Metadata' action is what we want. Select the 'Edit Metadata' action for the uploaded document.
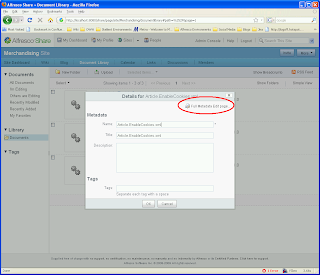
Here I selected edit metadata for an XML ddocument named 'Article.EnableCookies.xml'...

This looks pretty normal. It is the same popup as with previous version of Share allowing edit of basic metadata properties like Name, Title, Description and tags. But notice in the Upper right corner 'Full metadata Edit page...'. Selecting this will render a full screen rendering all of the document's metadata.
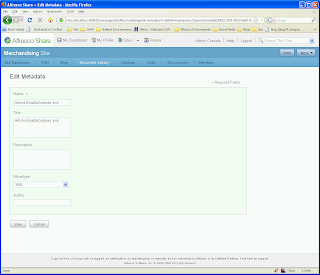
Here I am showing the full metadata page of the xml file I uploaded...

In this example, two new fields are rendered: the Mimetype, and the Author.
This full page renders the metadata form in 'Edit' mode using the new forms engine. The form is rendered by obtaining a form configuration from the remote alfresco repository. This form configuration is dynamically generated from the available metadata on the content item being viewed. The form archtiecture is capable of rendering the following types of controls (see more detail in the forms service wiki:
- mimetype -- <select> <option> from a list of mime types (i.e. application/pdf, ...)
- size -- display file size
- textarea -- <textarea> field configurable to r rows and c columns
- slectone -- <select> field with <option> tags dynamically rendered
- textfiled -- <input type="text"> field
- category -- picker selecting one or more categories to associate with the content
- endocding -- <select> field to choose <option> from list of encoding types (i.e. UTF-8, ISO-8859-1, ...)
- association -- picker selecting one or more other content items to associate this content item too
- checkbox -- <input type="checkbox"> field
- readonly -- <input type="text"> rendered as read only
- date -- renders a date picker setting value to an <input type="text"> field
- period -- selecting x days, weeks, etc.
To really show the custom metadata feature, we will look at another great feature added to Share 3.2, the ability to associate new aspects to documents. When we associate a new aspect, new properties can be added to the document and the edit metadata full form should reflect those changes. To do this, let us add the 'dublin core' aspect to the document we just looked at.
- Hover over the document --> the actions should render
- Select the 'more' option --> the more options should render
- Select the 'manage aspects' option --> the manage aspects popup will render
- Select the '+' by the 'Dublin Core' aspect in the 'Available to Add' list --> The 'Dublin core' should be removed from the 'Available to Add' and added to the 'Currently Selected' list
- Select the 'Apply changes' button to save the changes
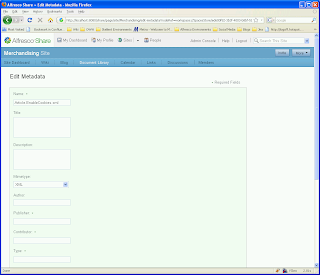
Here we see the edit metadata full page with the dublin core properties

The next blog entry will look at customizing share to display our own content types and aspects.


